Weaving is very simple. You essentially have two sets of threads – one set, pre-wound, called the warp, running vertically and kept under tension, and the other set threaded individually through the vertical threads, usually at right angles, called the weft.
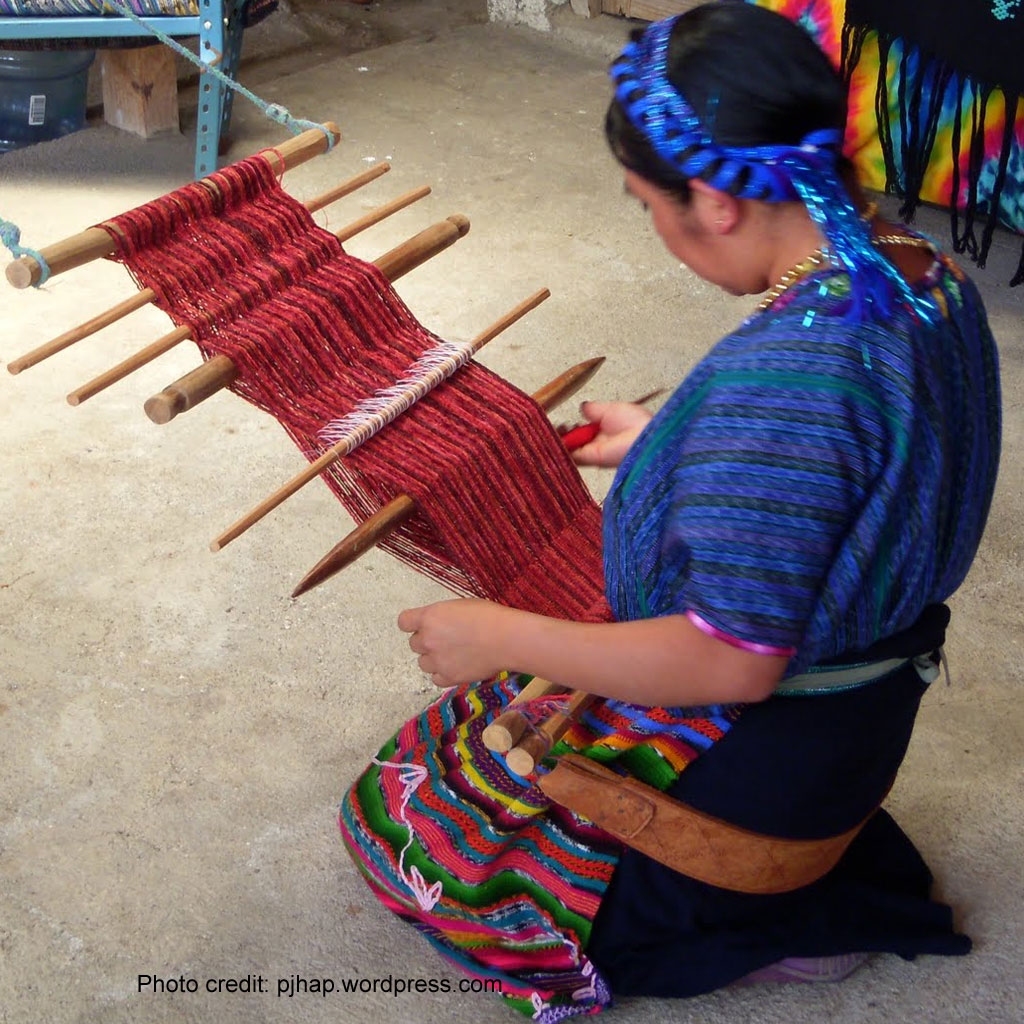
The simplest method is to use your body to tension the warp threads, which allows you to pack up and carry your whole project with you easily. This technique is is called backstrap weaving, is widely used across the world, especially in nomadic cultures, and can be found largely in Africa, Asia, and South America.
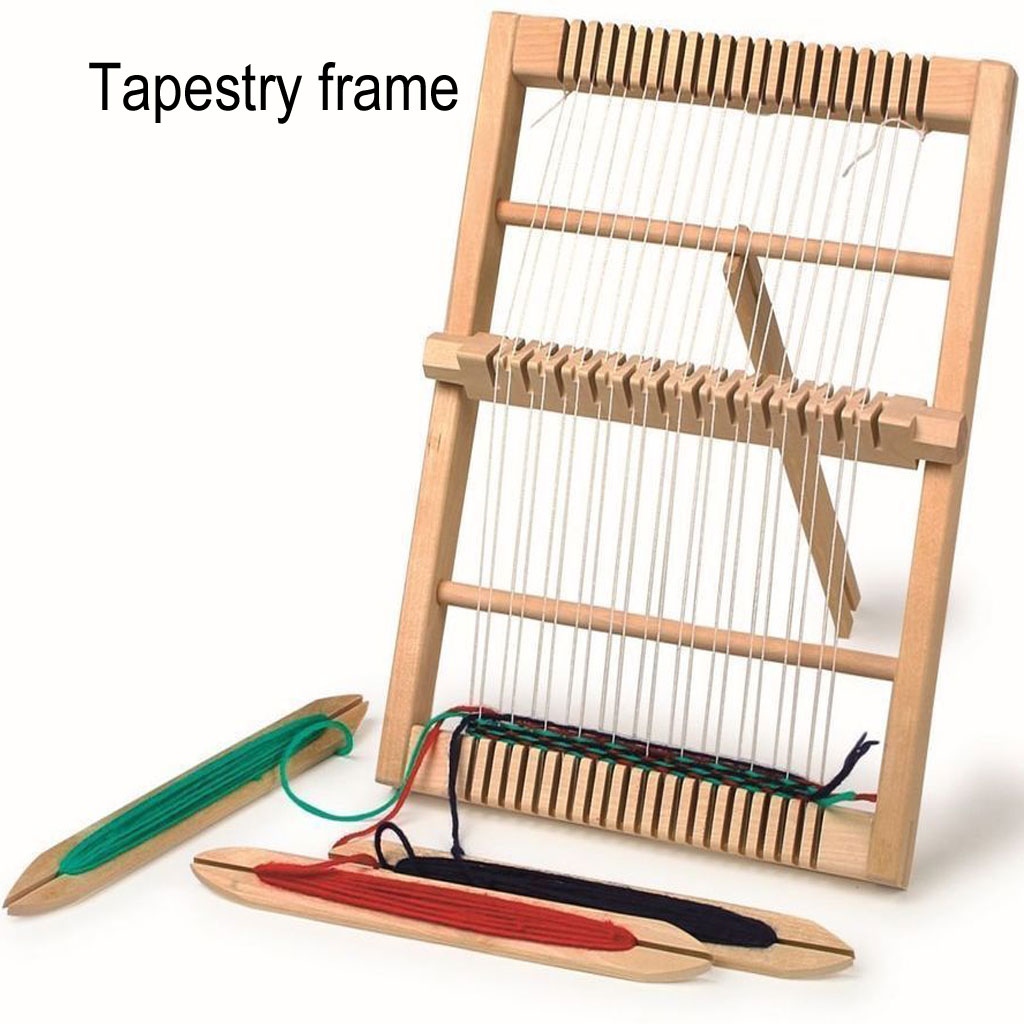
This is the easiest introduction to tapestry weaving, and you can build up areas of weave without having to take your weft thread completely from one side of the frame to the other. This is called discontinuous weft. Tapestry weavers use small butterflies of yarn for weft which they interweave raising and lowering the warp threads manually. This is both time-consuming and very versatile, and stunning effects can be created through pictorial detailing and use of a mixture of yarns.
The next adaptation is to fix a means of raising selected threads all at once, rather than picking up individual warp threads by hand. This is done with a continuous string which is looped around a round stick or dowel, then looped underneath the first thread you want to raise. Loop around the dowel again, and then down to the second thread you want to raise, repeating until you have looped the string under each thread that you wish to raise.
Whilst in tapestry weaving, that is usually made for alternate threads, you can also use the same method to lift selected threads to give you a specific pattern. Sticks are used for this in cultures such as Laos which enables highly decorative and complex patterning to create exquisite woven pieces.
The simplest form of weaving is plain weave. This can be done on any of the methods of weaving I’ve described so far. The weft goes over the first warp end, but under the second, then over the third, and under the fourth etc. It is easier if you lift the even numbered warp threads and pass the weft under them, leaving the odd numbered warp threads down so that the weft thread automatically passes between the two sets of threads. After the weft has finished that pass, the return journey is done lifting the odd numbered warp threads, and going over the even numbered warp threads. Then you start all over again.
This is the strongest structure you can use, and also one of the most versatile. It doesn’t sound very promising, but with variations in colour and thickness of the threads, and how far apart both the warp and the weft threads are (known as the sett), you can create the most gauzy of nets, attractive window blinds (including using bamboo in the weft), the most practical of handling cloths (think tea-towels), the flimsiest of transparent garments (think very fine saris), and the warmest of winter rugs for your floor. Not bad for a simple weave!
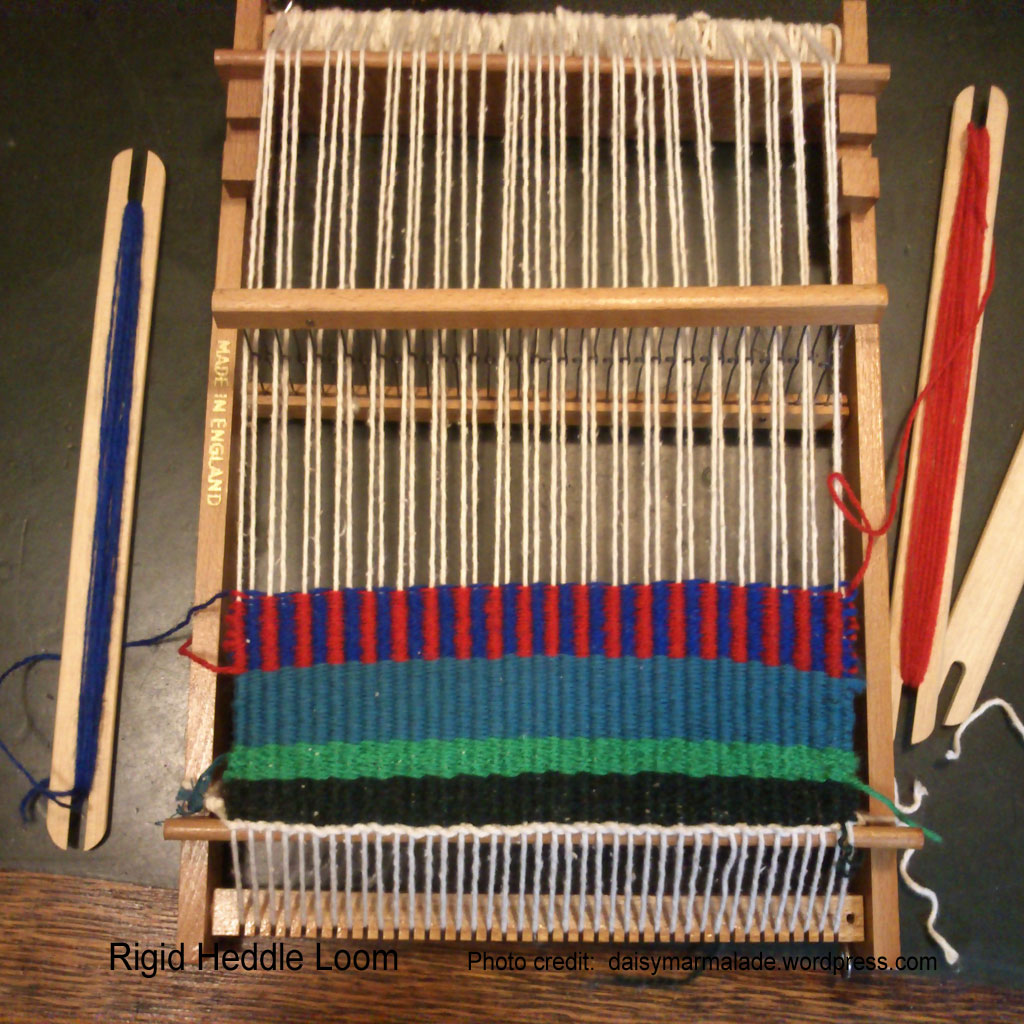
Moving on to more complex equipment, you can use a frame, or shaft, to lift your selected threads. The simplest method for this is with a box-shaped frame, called a rigid heddle loom, which consists of one ‘shaft’ but with two positions created through a slot and a hole alternating with each other.
You can have a simple mechanical loom starting with 2 shafts, but they usually have 4 or more, going right up to 40 shafts (occasionally more) for really complex patterns. A shaft is a simple frame with strings (heddles) of metal, cotton or nylon (known as Texsolv) suspended between the two horizontal bars of the frame.
The strings have an ‘eye’ (like that of a needle, but larger), in the middle of each string, through which is threaded an individual warp thread. Each shaft has a mechanism by which it can be raised and lowered which, when used in opposition to other shafts, creates a space (called the shed) through which a weft thread can be passed, thereby creating each line in a pattern.
Many patterns can be created through the different arrangements of raising and lowering the shafts. With 2 shafts, you can create plain weave as before. With 3 or more shafts, the permutations become much more varied.
I have a four-shaft loom which I use to teach beginners.
Four shafts give you the ability to create the simple plain weave fabrics, but also to get a lot more patterns. With a 4-shaft loom, the possibilities grow enormously. Firstly, you have the chance to vary the order in which you thread your warp. You can thread sequentially going from shaft 1 to 2 to 3 to 4 and repeating. Once you go above 2 shafts, you have more choices. Not only can you vary the order in which you thread the warp, but you can play around with the order of how you raise those shafts.
With 4 shafts, there are a potential 14 lift combinations. You can lift each of the four shafts individually (4 options), or raise any two of them together (6 options), or raise 3 of them all together (4 options). Why are there more options with raising two of them together? Well, you can lift shafts 1 and 2 together, 2 and 3, 3 and 4, 1 and 4, and also the plain weave of 1 and 3, followed by 2 and 4.
Plus you have the colour, thickness and sett variations I mentioned before! So you can see how many more patterns you can create by simply adding just another 2 shafts!
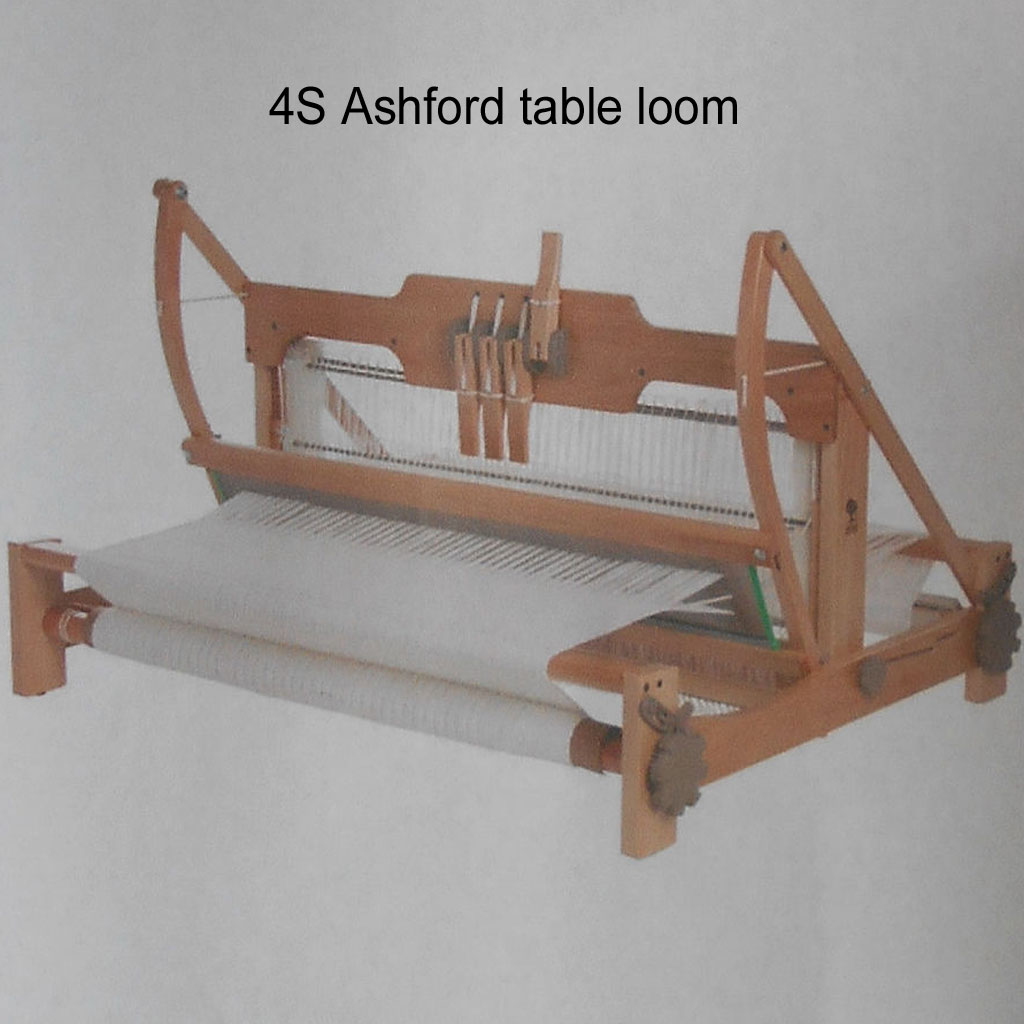
I also have eight-shaft table looms. This allows yet more possibilities. Now the lifting combinations of the 8 shafts have expanded to 254! (All up and all down don’t work for weaving) Of course, you don’t have to use all the 8 shafts! Just because they are there doesn’t mean you have to use them all. That’s the fun of having more shafts – you have the choice!
The most shafts that you can comfortably use on a table loom is 16, and I have one of those too! These are great for sampling as you can change your shaft selection impulsively on every pick if you wish, but it is slow going as you have to your shaft selection by hand for each pick, so often you will find floor looms quicker once you get weaving any length of cloth.
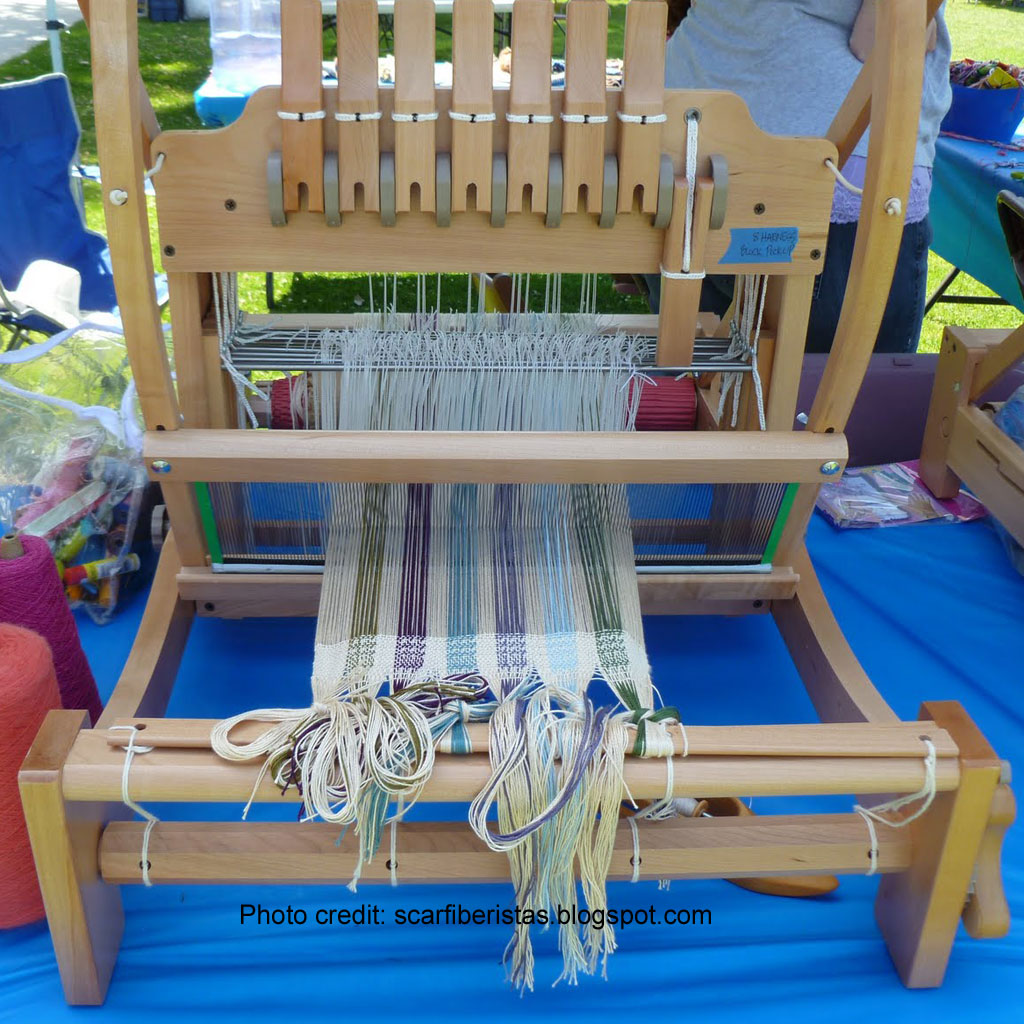
Floor Looms
Shaft Looms
Regular floor looms have pedals operated by your feet, instead of levers operated by your hands. The pedals are tied up in different ways so that each pedal will be attached to several different shafts to make it easier to weave a pattern. There are different systems of tieing-up different looms but they all speed up the weaving process which is ideal if you are weaving most projects.
The size of the loom gives you physical constraints in how many pedals you can fit inside your loom. With 8-12 shafts, you often need 14 pedals to give you some variations in your weaving patterns. As you can imagine, you need to think about the tie-ups quite carefully to give you the results you want, because the greater the number of shafts you have, the more pedals you will need. The space taken by 14 pedals leads to quite extensive leg movements (kind of like playing the pedals on a church organ). So what to do with a loom needing 16 shafts or more?
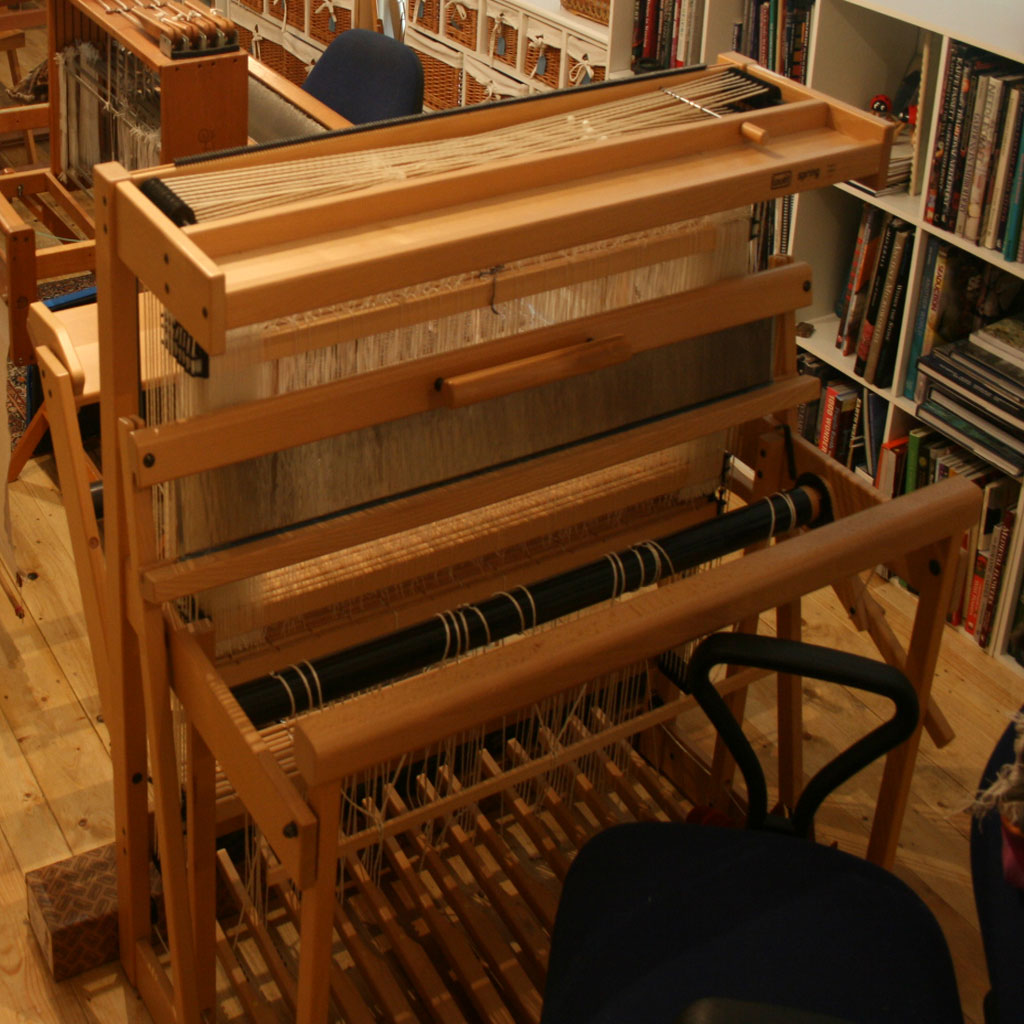
Let me introduce you to the dobby loom, an ingenious device which puts the shaft selection into a box on the side or the top of the loom, and you only need one or two pedals to operate the selection. All the shafts are connected to the selection device which is operated by one of two ways – mechanical or electronic. In the mechanical version, shafts are selected by means of a series of pegs inserted into a bar (called a lag). Each peg denotes the shaft you want lifted at any one time. Each lag (with one or more pegs) denotes the pick (or row) that you are weaving. The lags are on a cogged mechanism which presents each lag individually to a series of rods with hooks on the top which are pushed away or up (depending on the make of loom) which pushes the engaged rods (and therefore the hooks) into the path of a moving ‘knife’ (called a griffe) which catches the hooks and lifts them up, so thereby lifting up their respective shafts.
In the electronic version, the selection device contains solenoids that take the place of the pegs, and the solenoids push flexible cables into the path of the griffe according to the simple binary code sent to them via a weaving computer programme.
A computer-assisted loom is connected to a laptop/pc/tablet which has weaving software on it. The weaving software is wonderful for speeding up the hand-drafting that used to be required pre-computers. However, it doesn’t mean you save time, as designing then becomes compulsive and you just want to try another idea and see what that looks like!
When you have traditional floor-looms with tie-ups and pedals, you can weave from your software, but you still need to tie-up your pedals by hand, and then follow your pattern using your feet as normal. With a dobby loom, though, you can connect your laptop to your computer and have the computer drive the shaft selection so it automatically selects the next shafts as you have designed.
There used to be a hoo-hah about using computers in this way. There were a number of people who believed that this was no longer hand-weaving. However, as you still physically have to prepare your loom to weave, and then design your pattern, then physically sit down to weave, throwing the shuttle by hand, weaving on computer-assisted looms is now regarded as still handweaving. I suppose you can compare the use of computers in hand-weaving as similar to a woodworker using an electric lathe or a potter using an electric wheel. It’s machine assistance, but the lathe or the wheel couldn’t do the job on its own – the craftsman still needs to know what to do and do it!
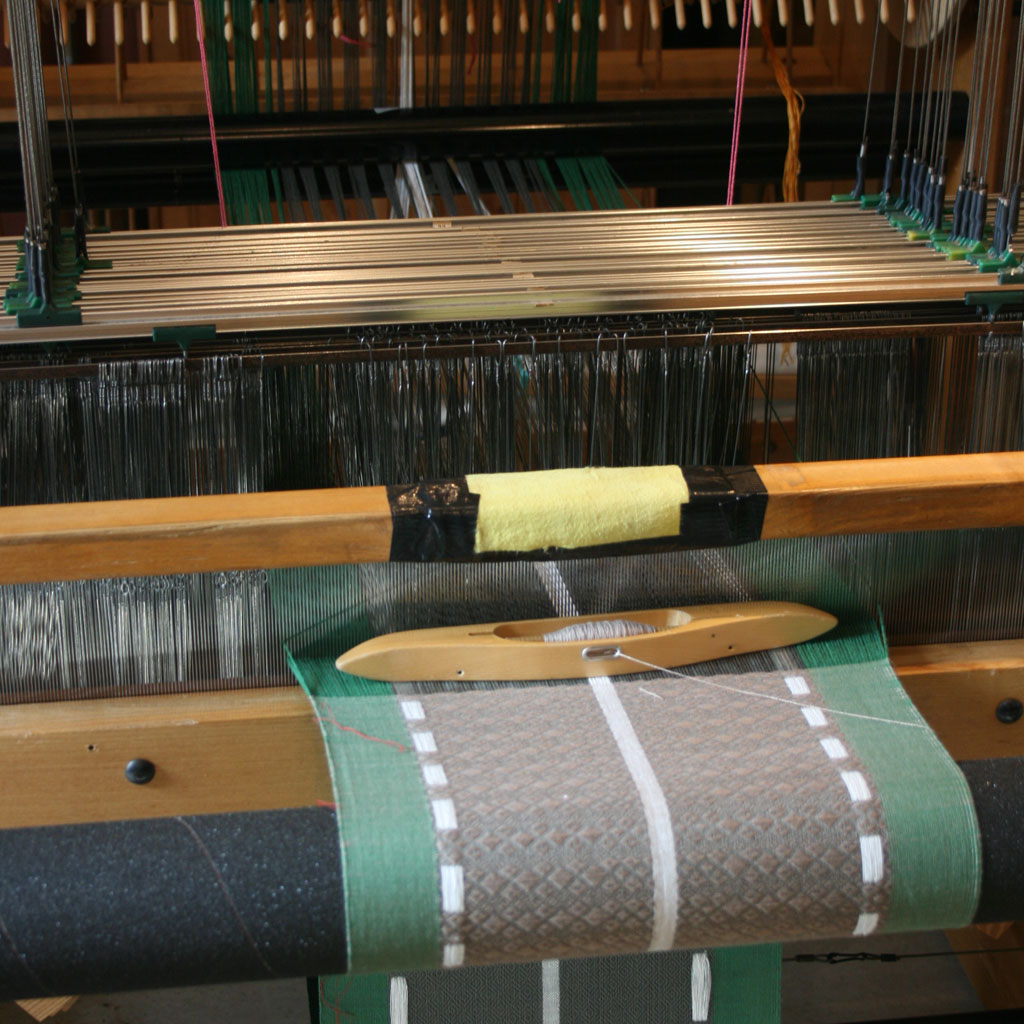
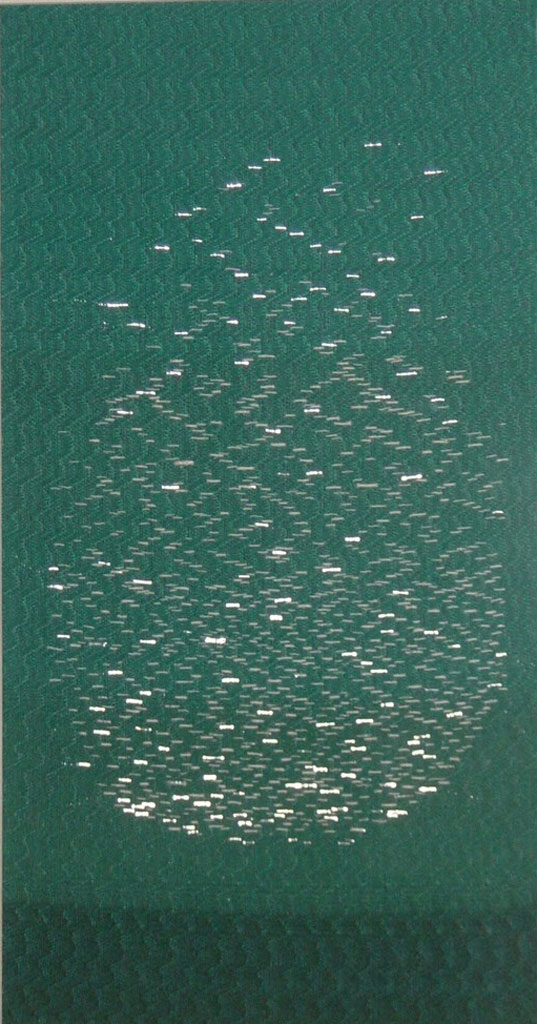
On a 24-shaft loom, you can create patterning but you can also create artwork, if you are prepared to spend a little time and do some bits by hand. Here is one of a series of 3 pieces based on the Blue Planet series of natural history programmes narrated by David Attenborough and filmed by the BBC’s Natural History unit based in Bristol. The first piece in this series was shown in the Birmingham Museum and Art Gallery for 6 years, along with a video of me explaining weaving.
This is the first piece in which I created a visual ‘slice’ through the ocean, changing the colours gradually from the depths to the surface. The fish were laid in as I wove, and I used a technique called network drafting to create the movement of the waves. I like to combine technical weaving skills with artistic interpretation.
To take this kind of art weaving further, there is another kind of loom which has the capacity to lift threads in small groups. This is a method of weaving pictorially that has a long history and the loom is called a “draw loom”.
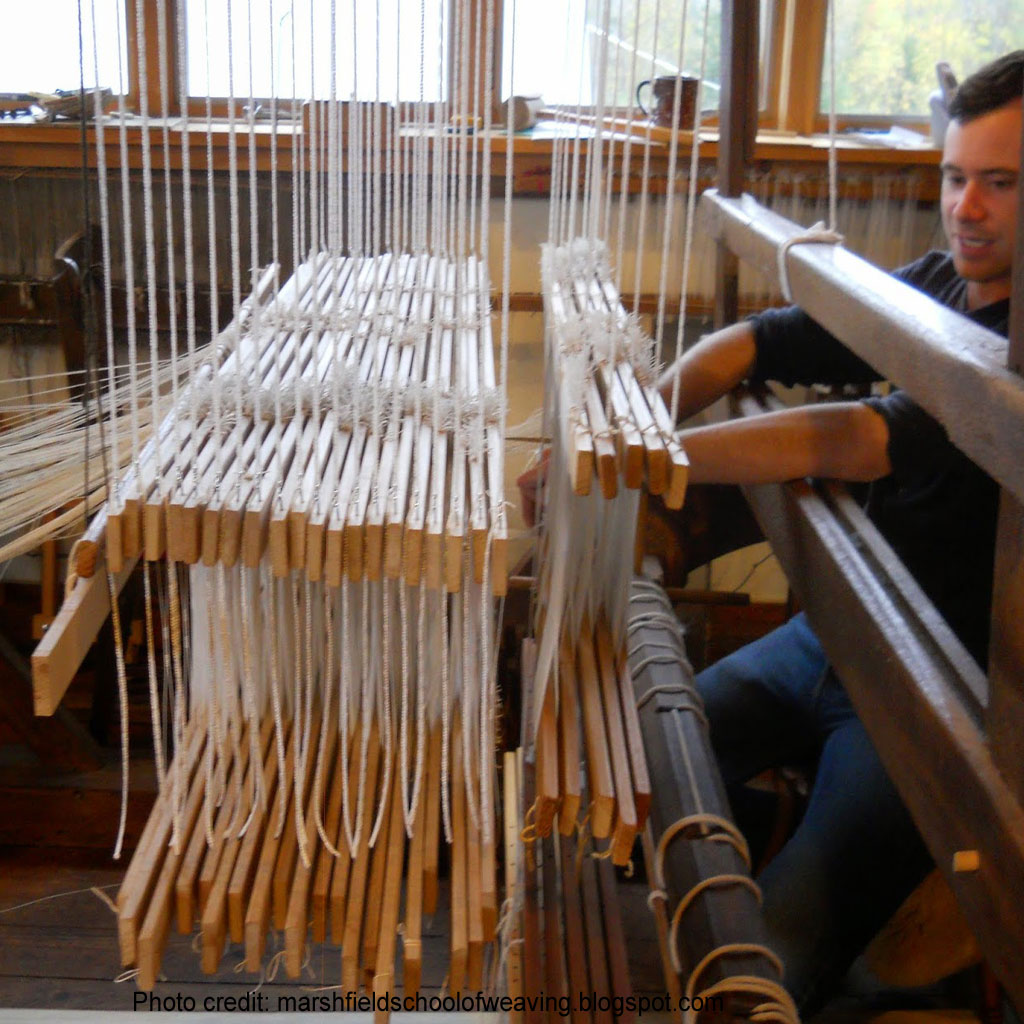
With a draw loom, you have a floor loom with shafts, but you also have an extra section (called a ‘harness’) behind the shafts where small groups of threads are grouped together and used as if they were one thread. They can be operated individually through being lifted manually to create imagery. The heddles on the main shafts, which weave the main fabric all the way through (known as a ‘ground’ weave) have extra long eyes to allow for the same threads to be lifted in a different order on the back harness.
You can see the system on the image here. The shafts to the right of the image are the ground shafts, which weave the background weave. There are more shafts to the harness on the left of the picture, which is the draw loom element. Different groups of warp threads are attached to different shafts and give the units of design which can be used for creating imagery. The more design shafts you have, the more detailed your design.
This system has been in use for many centuries, starting in the China and the Middle East/Persia, moving gradually west to Europe and was used to create many fabulous designs woven in France, Belgium, Italy and other places that can still be seen in famous chateaux and palazzos. Early systems used two people – the weaver who wove the fabric, and the ‘draw-boy’ who lifted the previously selected threads. The Chinese draw-boy sat on top of the loom and raised the threads. In Europe a system was developed where groups of threads were pulled from the side of the loom. Modern draw looms allow the weaver alone to pull the draw cords and weave at the same time.
Prior to the draw loom, highly detailed and intricate designs were woven through manually picking up individual threads or groups of threads, a painstaking process, and there are still superb ancient examples from China, Syria and elsewhere showing the amazing craftsmanship of the weavers. However, the development of the draw loom and, later still, the jacquard loom, took the ease of weaving such detailed and time-absorbing fabrics to the next level.
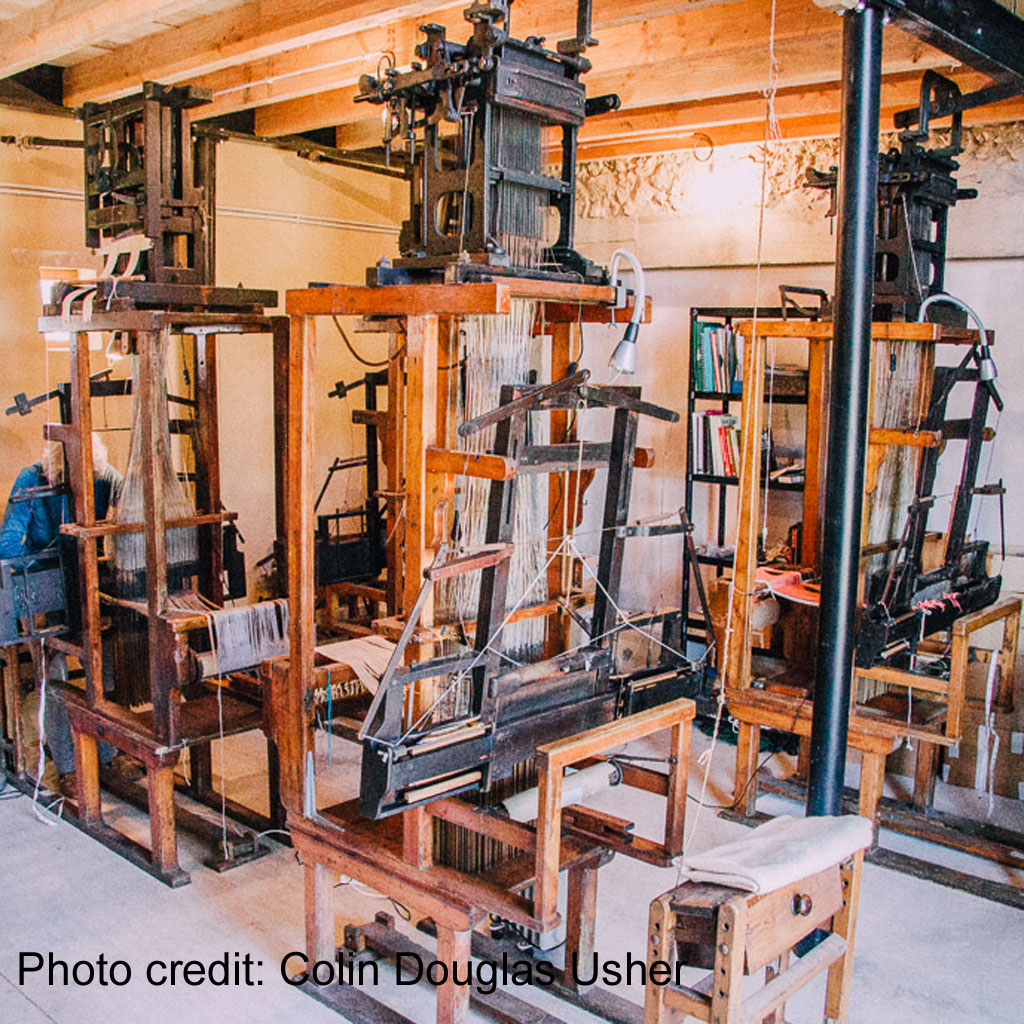
During the late C18th, innovations in technology, especially with the rivalry between France and England during the Industrial Revolution, led to the draw loom developing into the jacquard loom. I can recommend Jacquard’s Web by James Essinger as an informative and entertaining read into the history of the jacquard loom. Basically, Jacquard was the last in a string of inventors who each contributed adaptations that transformed the draw loom into a loom that could lift each thread individually without the use of anyone other than the weaver to manipulate each thread. It was such a breakthrough and of such economic importance that industrial espionage was engaged in to smuggle the protected jacquard to other countries!
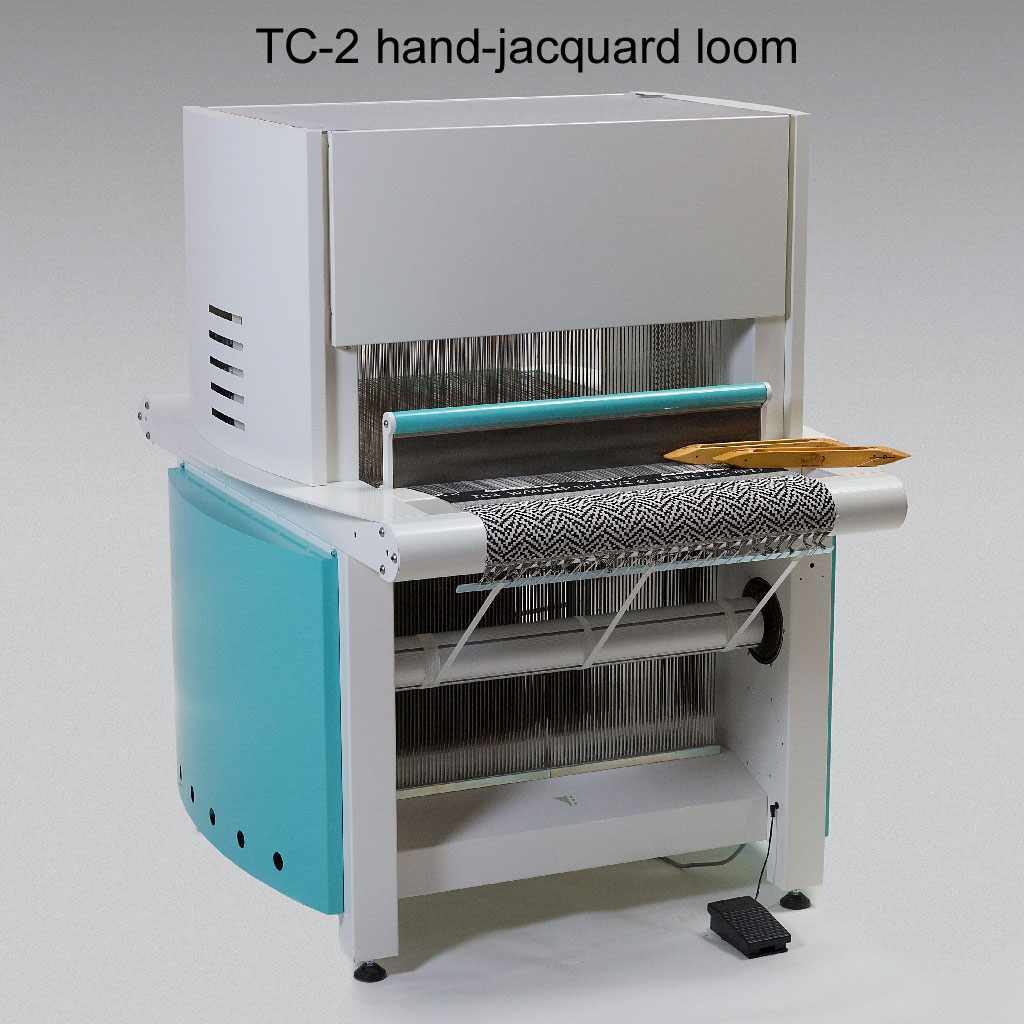
The jacquard is the equivalent to playing a sonata on the piano. Each thread is independent within a specified range ie 192 threads, or 384 threads, etc. Pictures can be created, but it needs a sophisticated mechanism to operate it, and, in my case, a whole new set of skills had to be learned in order to design effectively (I went to the Lisio Foundation in Florence for 2 1/2 months to study – a wonderful time and great teachers), and then to translate that design into a set of operating instructions for the loom to follow. The closest music-related system is that of the pianola – a player piano – where the operating instructions are encoded on a card roll which has holes cut out where the individual notes are to be played.
This link will show you the principles of jacquard weaving step by step.
In September 2005, I acquired 4 sample jacquard hand-looms with a weaving width of just 13″ and different harness set-ups, which means that the same design can be woven with a different proportion on each loom – an invaluable teaching and sampling aid! They came from Leeds University where they had originally been assembled from new in the weaving studio, around 1880, I believe. These delightful looms have a gorgeous patina from over a century of use, along with perch stools and exquisite miniature shuttles and pirns and are treasures of traditional techniques.
They are a fabulous piece of England’s textile heritage and I am delighted to have renovated them so they can be used once more, this time in the country where the jacquard loom was originally developed – France.
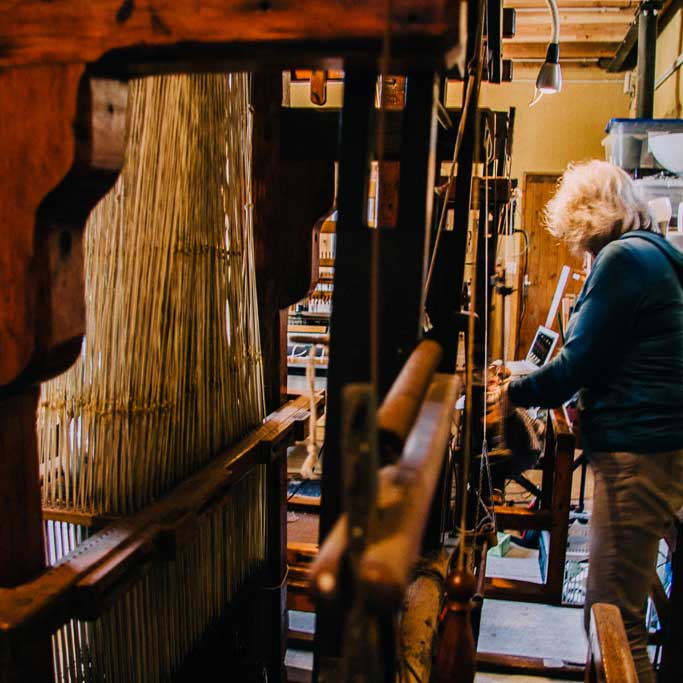
The perfect marriage is a combination of both traditional and electronic jacquard looms, as the knowledge and understanding gained through the design process, card-cutting and weaving on the old looms, slow as it is, cannot be under-estimated, but the ease of changing designs quickly and rapid sampling on the electronic hand-jacquard loom is very gratifying. There are now increasing numbers of weavers who are producing amazing work on the electronic jacquard loom.
